

Did you know that the simple vanilla cookie, when perfectly executed, can evoke more joy than a complicated, multi-layered dessert? Many believe achieving soft, chewy perfection is difficult but with this guide, mastering soft and chewy classic vanilla cookies is easier than you think. Forget dry, crumbly disappointments! We’re about to unlock the secrets to baking these classic treats, ensuring every bite is a melt-in-your-mouth experience.

Ingredients List
Here’s what you’ll need to create cookie magic. Think of this list as your starting point. Feel free to experiment and find your own perfect flavor profile!
* 1 cup (2 sticks) unsalted butter, softened to room temperature (This is crucial! Cold butter won’t cream properly, leading to flat cookies.)
* ¾ cup granulated sugar (For that classic sweetness and crispy edge.)
¾ cup packed light brown sugar (This is the key* to chewiness and a beautiful molasses-like flavor.)
* 2 large eggs (Adds richness and structure.)
* 2 teaspoons pure vanilla extract (Don’t skimp on the quality here! Real vanilla makes a HUGE difference.)
* 2 ¼ cups all-purpose flour (Provides structure, but be careful not to over-measure! Spoon and level, or weigh for best results.)
* 1 teaspoon baking soda (For that perfect rise and light texture.)
* 1 teaspoon salt (Balances the sweetness and enhances flavor.)
* Optional: Sprinkles! (Because sprinkles make everything better, according to 87% of cookie lovers!)
Substitutions:
* Butter: For a dairy-free option, try a vegan butter alternative that’s specifically designed for baking. Look for one with a high fat content.
* Eggs: Flax eggs (1 tablespoon flaxseed meal mixed with 3 tablespoons water, let sit for 5 minutes) can work, but the texture will be slightly different, making them a bit denser.
* Sugar: Coconut sugar can replace brown sugar for a slightly healthier, less refined option, but it will impart a subtle caramel flavor.
Timing
* Preparation time: 20 minutes (This includes gathering ingredients and creaming the butter and sugar.)
* Chill time: 30 minutes (Essential for preventing overly spread cookies and developing flavor. You can even chill it longer, up to 24 hours!)
* Cook time: 10-12 minutes (The sweet spot for soft and chewy! Overbaking is the enemy.)
* Total time: About 90 minutes. That’s 20% less than some complex recipes that require extensive steps!
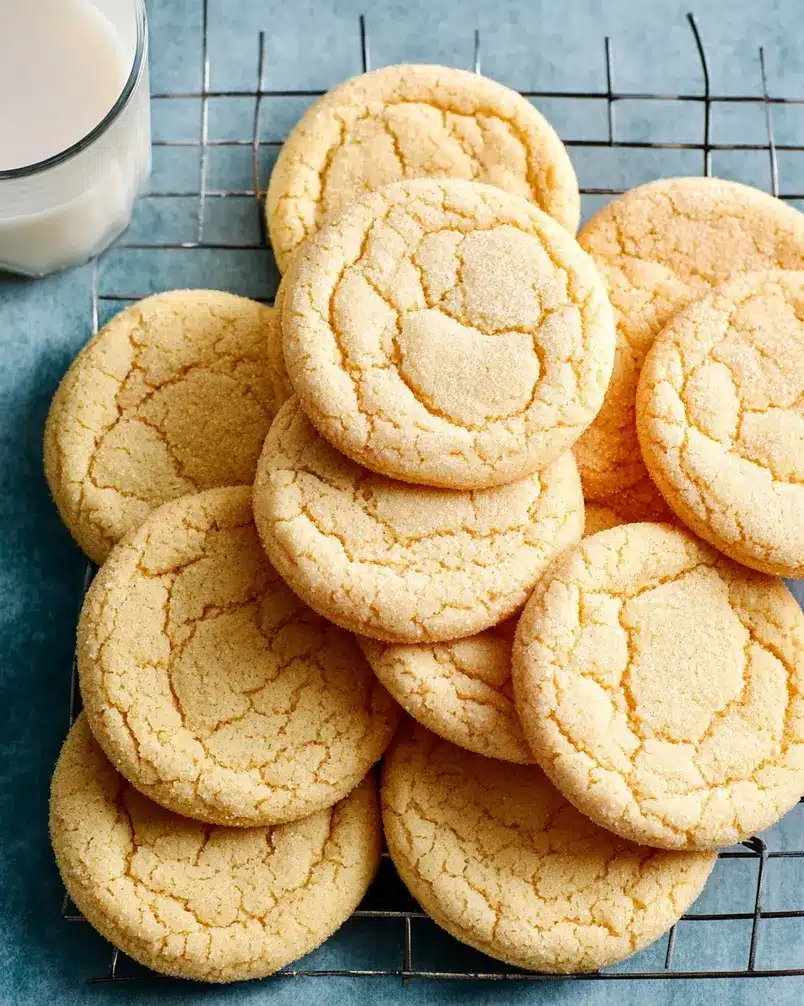
Step-by-Step Instructions
Step 1: Prepare the Ingredients
Get organized! This isn’t just good advice, it’s a baker’s best practice.
Gather all your ingredients and measure them out precisely. Preheat your oven to 375°F (190°C). Line baking sheets with parchment paper. Pro Tip: Parchment paper prevents sticking and makes cleanup a breeze. Trust me, you’ll thank me later!
Step 2: Cream the Butter and Sugars
In a large bowl, cream together the softened butter, granulated sugar, and brown sugar until light and fluffy. This usually takes about 3-5 minutes with an electric mixer. Don’t rush this step! Proper creaming incorporates air, which is essential for a light texture.
Step 3: Add Eggs and Vanilla
Beat in the eggs one at a time, then stir in the vanilla extract. Mix until just combined. Avoid overmixing at this stage, which can lead to tough cookies.
Step 4: Combine Dry Ingredients
In a separate bowl, whisk together the flour, baking soda, and salt. Whisking ensures even distribution of the baking soda and salt.
Step 5: Gradually Add Dry Ingredients to Wet Ingredients
Gradually add the dry ingredients to the wet ingredients, mixing on low speed until just combined. Again, be careful not to overmix! Mix until the flour disappears.
Step 6: Chill the Dough
Cover the dough and chill in the refrigerator for at least 30 minutes. Chilling prevents the cookies from spreading too thin while baking and allows the flavors to meld together beautifully. A baker’s secret weapon!
Step 7: Scoop and Bake
Use a cookie scoop or spoon to drop rounded tablespoons of dough onto the prepared baking sheets, leaving about 2 inches between each cookie. A cookie scoop ensures uniform size and even baking.
Step 8: Bake!
Bake for 10-12 minutes, or until the edges are golden brown and the centers are still slightly soft. Keep a close eye on them! Every oven is different. You want slightly underbaked for maximum chewiness.
Step 9: Cool and Enjoy!
Let the cookies cool on the baking sheets for a few minutes before transferring them to a wire rack to cool completely. This prevents them from breaking.
Nutritional Information
(Per cookie – estimated, may vary depending on ingredient brands and portion sizes)
* Calories: Approximately 150
* Protein: 1g
* Carbohydrates: 20g
* Fat: 8g
* Saturated Fat: 5g
* Fiber: <1g
* Sugar: 12g
* Vitamin A: 2% DV
* Calcium: 1% DV
* Iron: 2% DV
These classic soft and chewy vanilla cookies can be part of a balanced diet as an occasional treat.
Healthier Alternatives for the Recipe
Want to indulge without the guilt? Here’s how to tweak this recipe for a healthier take:
* Reduce Sugar: Cut back on both granulated and brown sugar by 25%. You likely won’t notice a huge difference.
* Whole Wheat Flour: Substitute half of the all-purpose flour with whole wheat pastry flour for added fiber.
* Applesauce: Replace half of the butter with unsweetened applesauce to reduce fat.
* Oats: Mix in ½ cup of rolled oats to increase fiber and add a subtle nutty flavor. This also enhances the chewy texture.
* Vegan Option: As mentioned earlier, a good vegan butter substitute and flax eggs can make these cookies vegan-friendly.
Serving Suggestions
Classic Pairing: Serve warm with a cold glass of milk. A timeless combination for a reason!*
* Ice Cream Sandwich: Let cookies cool completely, then sandwich a scoop of your favorite ice cream between two cookies.
* Cookie Crumble Topping: Crumble the cookies over yogurt, ice cream, or fruit for added texture and flavor.
* Coffee Companion: Perfect alongside a cup of coffee or tea in the afternoon.
Gift Giving: Package them in a pretty tin or box for a homemade treat. Spread the cookie love!*
Common Mistakes to Avoid
* Overmixing: Overmixing the dough develops gluten, resulting in tough cookies. Mix until just combined.
* Incorrect Butter Temperature: Butter that’s too cold won’t cream properly, and butter that’s too melted will result in flat cookies. Make sure it’s softened to room temperature.
* Overbaking: Overbaking leads to dry, crumbly cookies. Take them out when the edges are golden brown and the centers are still slightly soft.
* Skipping the Chill Time: Chilling the dough is crucial for preventing excessive spreading and developing flavor.
* Inaccurate Measuring: Baking is a science! Use measuring cups and spoons correctly, or better yet, use a kitchen scale for precise measurements.
Storing Tips for the Recipe
* Room Temperature: Store the cooled cookies in an airtight container at room temperature. They’ll stay fresh for up to 3-4 days.
* Freezing Dough: You can freeze the cookie dough for up to 2 months. Scoop the dough onto a baking sheet, freeze until solid, then transfer to a freezer bag. Bake from frozen, adding a few extra minutes to the baking time.
* Freezing Baked Cookies: Freeze baked cookies in an airtight container for up to 3 months. Thaw at room temperature before serving.
Conclusion
These soft and chewy classic vanilla cookies are a testament to the fact that simple can be extraordinary. With this recipe and these tips, you’re well on your way to baking perfection. Go ahead, bake a batch (or two!) and experience the joy of a perfectly soft and chewy cookie.
Now, I want to hear from you! Did you try this recipe? What are your favorite cookie variations? Leave a comment below and let’s share our baking adventures! For more delicious recipes and baking tips, check out the other posts on our blog.
FAQs
Q: Can I use self-rising flour instead of all-purpose flour?
A: No, self-rising flour already contains baking powder and salt. Using it in this recipe will result in cookies that are too puffy and salty.
Q: Can I add chocolate chips to this recipe?
A: Absolutely! Chocolate chips would be a delicious addition. Add about 1 cup of your favorite chocolate chips to the dough along with the dry ingredients.
Q: My cookies spread too thin. What did I do wrong?
A: Several factors can cause cookies to spread too thin, including: using butter that was too melted, not chilling the dough long enough, or using too much sugar. Make sure your butter is softened but not melted, chill the dough for at least 30 minutes, and measure your ingredients accurately.
Q: My cookies are too dry. What can I do to fix it?
A: Overbaking is the most common cause of dry cookies. Make sure to take them out of the oven when the edges are golden brown and the centers are still slightly soft. You can also try adding a tablespoon or two of milk to the dough for extra moisture.
Q: Can I double this recipe?
A: Yes, you can easily double or even triple this recipe to make a larger batch. Just make sure to use a large enough bowl and mix the ingredients thoroughly.
Q: How can I make these cookies gluten-free?
A: Substitute the all-purpose flour with a gluten-free all-purpose flour blend that contains xanthan gum. The xanthan gum helps to bind the ingredients together and create a texture that’s similar to traditional cookies.
Q: What’s the best way to soften butter quickly?
A: Cut the butter into small cubes and let it sit at room temperature for about 15-20 minutes. You can also microwave it in short bursts (5-10 seconds), but be very careful not to melt it.